> ## Documentation Index
> Fetch the complete documentation index at: https://flutterwaveinc.mintlify.site/llms.txt
> Use this file to discover all available pages before exploring further.
# Flutterwave Standard
> Learn how to use Flutterwave's Standard flow to make payments.
Flutterwave's payment flow works as follows:
* Make a server-side request to our [create payment endpoint](/api-reference/charges/card).
* We’ll return a link to a payment page. Simply redirect your customer to this link to complete their payment.
* Once the transaction is completed, we’ll redirect the customer back to your site.
## Step 1: Create Payment Details
First, you need to create the payment details for the transaction. Here is a list of the parameters you'll need:
| Parameters | Definition |
| ------------------------------ | --------------------------------------------------------------------------------------------------------------------------------------------------- |
| `tx_ref` | A reference code you'll generate to identify this transaction. This **must** be unique for every transaction. |
| `amuont` | The amount to charge the customer. |
| `currency` | The currency to charge in. If you don't specify a value, we'll assume `"NGN"`. |
| `redirect_url` | The URL to redirect the customer to after payment is done. |
| `customer` | An object containing the customer details. An `email` is required, and you can also pass a `name` and `phonenumber`. |
| `session_duration` (optional) | The duration (minutes) that the session should remain valid for. The maximum possible value is 1440 minutes (24 hours). |
| `max_retry_attempt` (optional) | This allows you to set the maximum number of times that a customer can retry after a failed transaction before the checkout is closed. |
| `customizations` (optional) | An object containing options to customize the look of the payment modal. You can set a `title`, `logo`, and `description`. |
| `meta` (optional) | An object containing any extra information you'd like to store alongside the transaction e.g `{consumer_id: 23, consumer_mac: '92a3-912ba-1192a'}`. |
| `payment_plan` (optional) | The payment plan ID (for when you're collecting a [recurring payment](/other-features/recurring-payments/payment-plans)). |
| `subaccounts` (optional) | An array of objects containing the subaccount IDs to split the payment into. See [split payments](/other-features/split-payments) for more on this. |
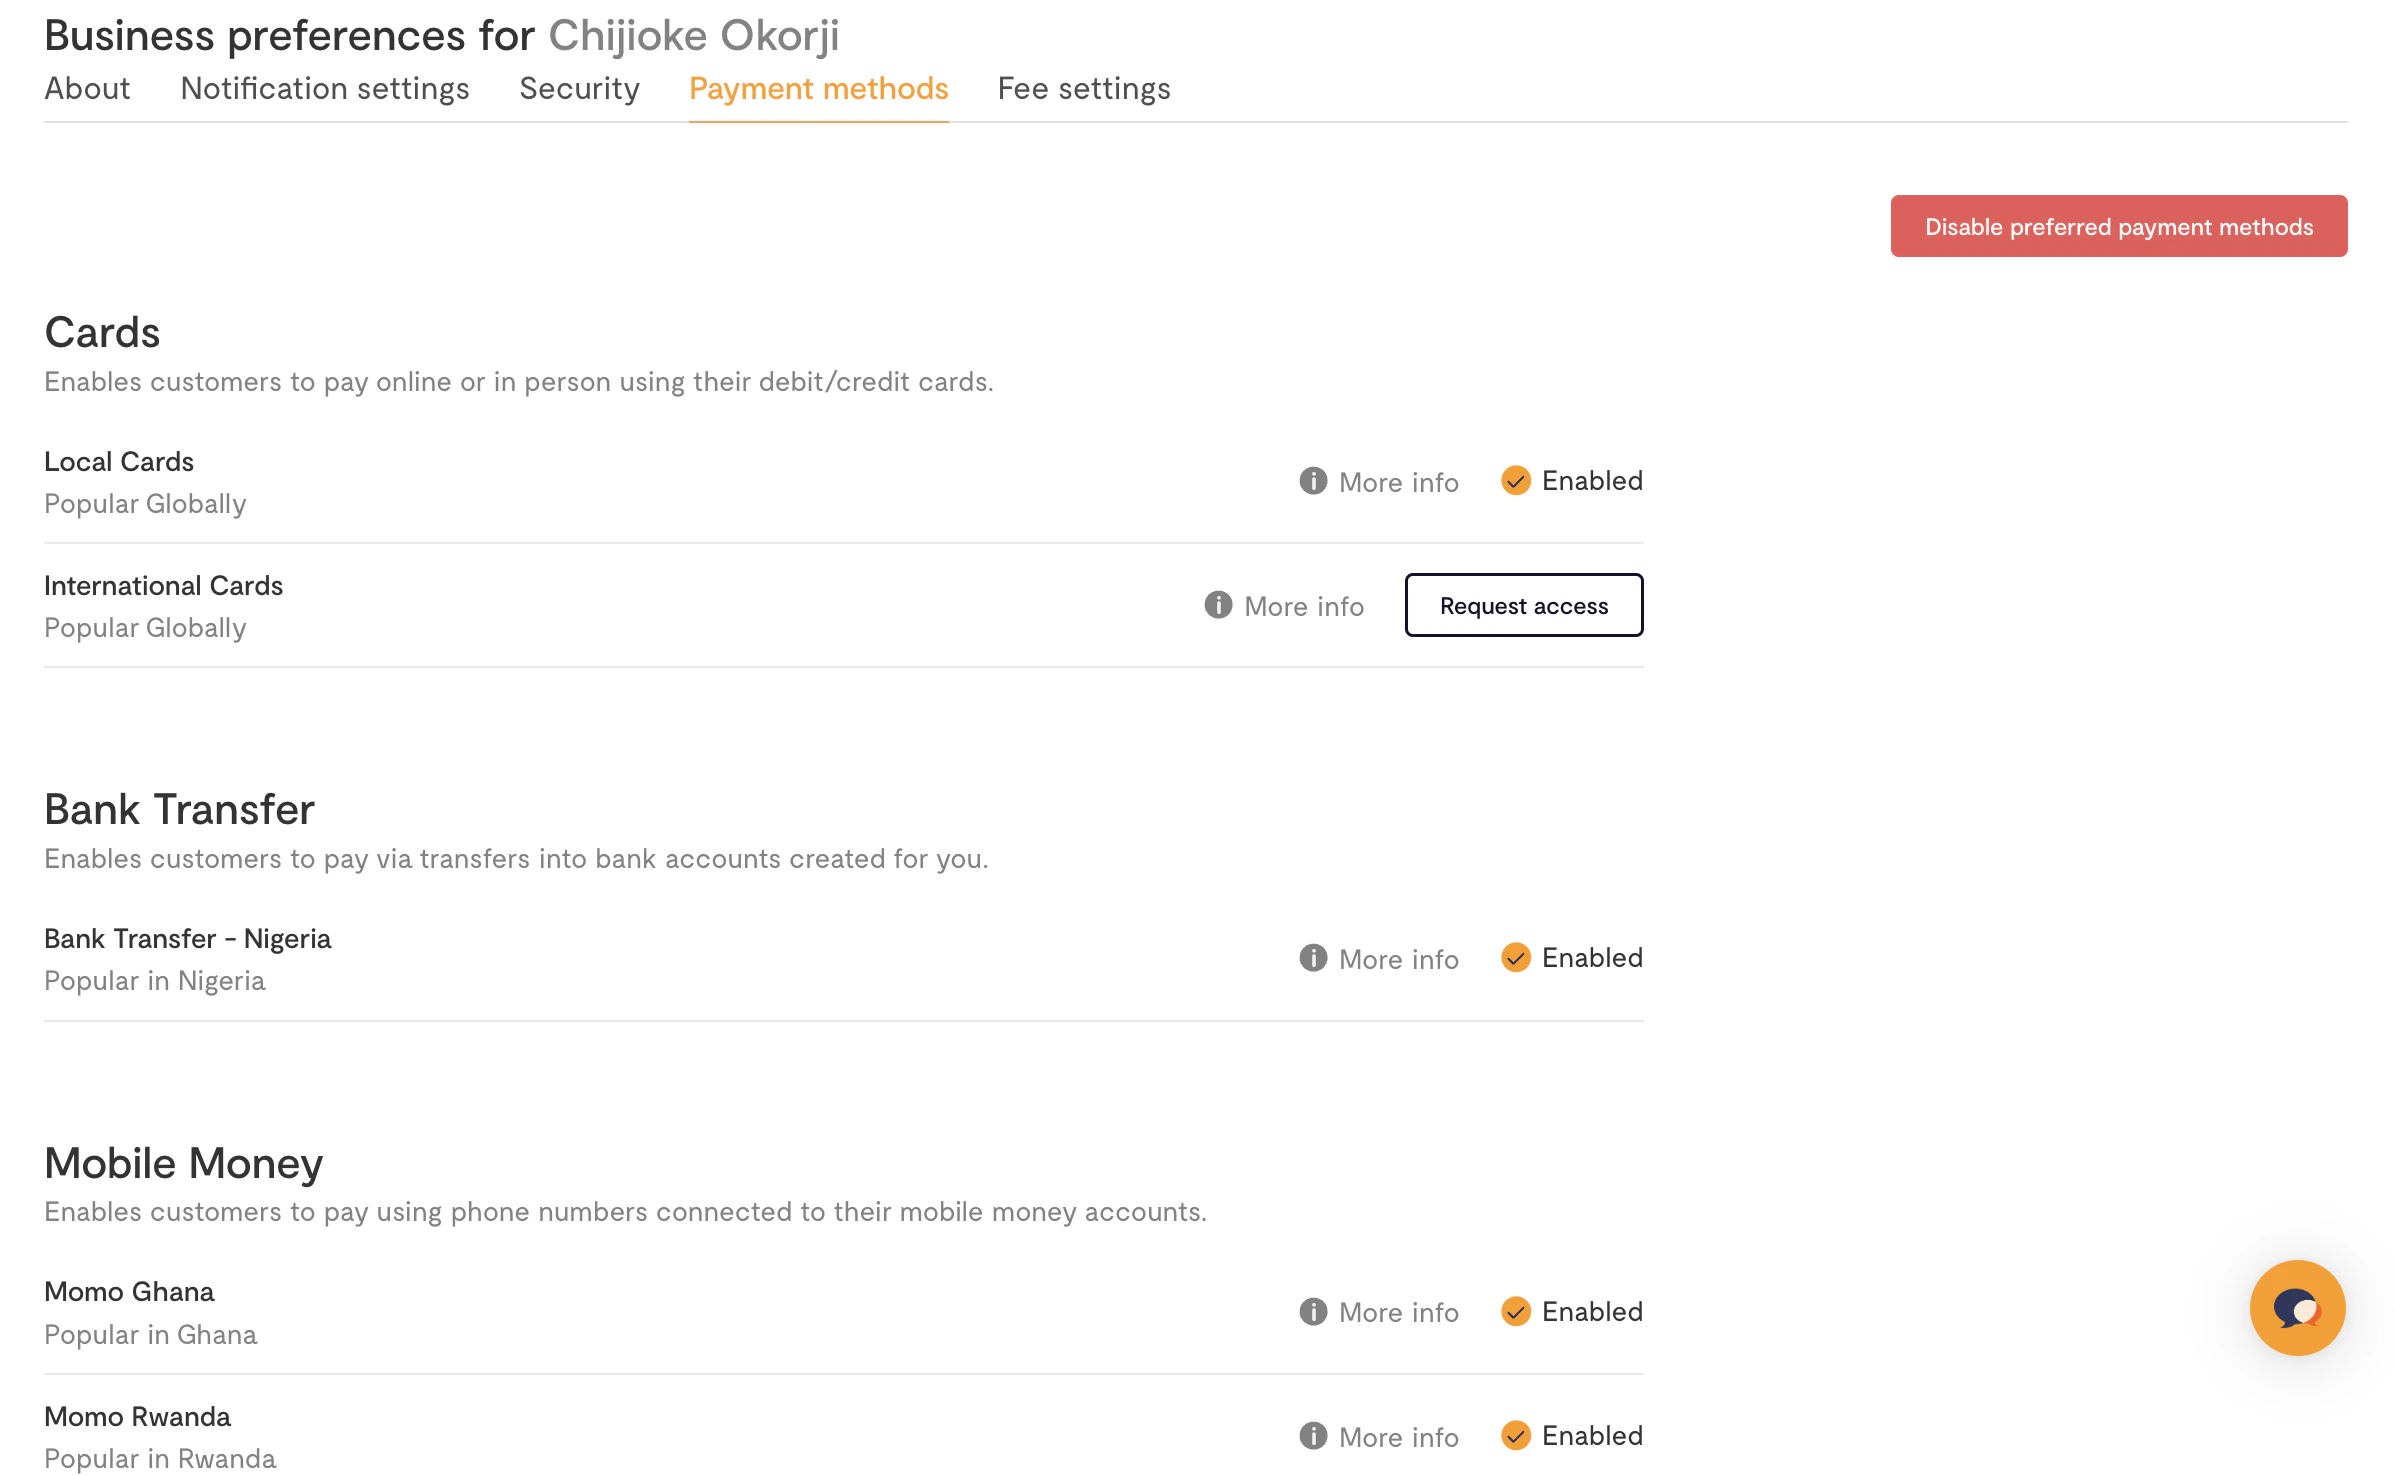
| `payment_options` (optional) | The payment options to be displayed. See [payment methods](/payments-embed/payment-methods). |
The `payment_options` field only works if you've toggled **Enable preferred
payment methods** in the **Business preference settings** on your
[Dashboard](https://app.flutterwave.com/dashboard/home/).
 ### Transaction Integrity
To ensure the security of payments on the client side, you can optionally use the [checksum](/checksum) feature.
To utilize it when initiating the charge, you need to include a field called `payload_hash` in the request payload. This is a hashed value created by encrypting some immutable values in your request.
The hash is computed at runtime, and compared to the value that has been passed in your request to ensure that the payment is secure.
## Step 2: Get a Payment Link
Next, you'll initiate the payment by calling our API with the collected payment details (remember to authorize with your secret key). Here's an example in Node.js
```javascript Node.js theme={null}
const axios = require('axios');
try {
const response = await axios.post(
'https://api.flutterwave.com/v3/payments',
{
tx_ref: 'UNIQUE_TRANSACTION_REFERENCE',
amount: '7500',
currency: 'NGN',
redirect_url: 'https://example_company.com/success',
customer: {
email: 'developers@flutterwavego.com',
name: 'Flutterwave Developers',
phonenumber: '09012345678',
},
customizations: {
title: 'Flutterwave Standard Payment',
},
},
{
headers: {
Authorization: `Bearer ${process.env.FLW_SECRET_KEY}`,
'Content-Type': 'application/json',
},
}
);
} catch (err) {
console.error(err.code);
console.error(err.response.data);
}
```
And you'll get a response like this:
```json Success theme={null}
{
"status": "success",
"message": "Hosted Link",
"data": {
"link": "https://checkout.flutterwave.com/v3/hosted/pay/flwlnk-01hynrt7cd1fpm6gtef6khn93g"
}
}
```
## Step 3: Redirect the User to the Payment Link
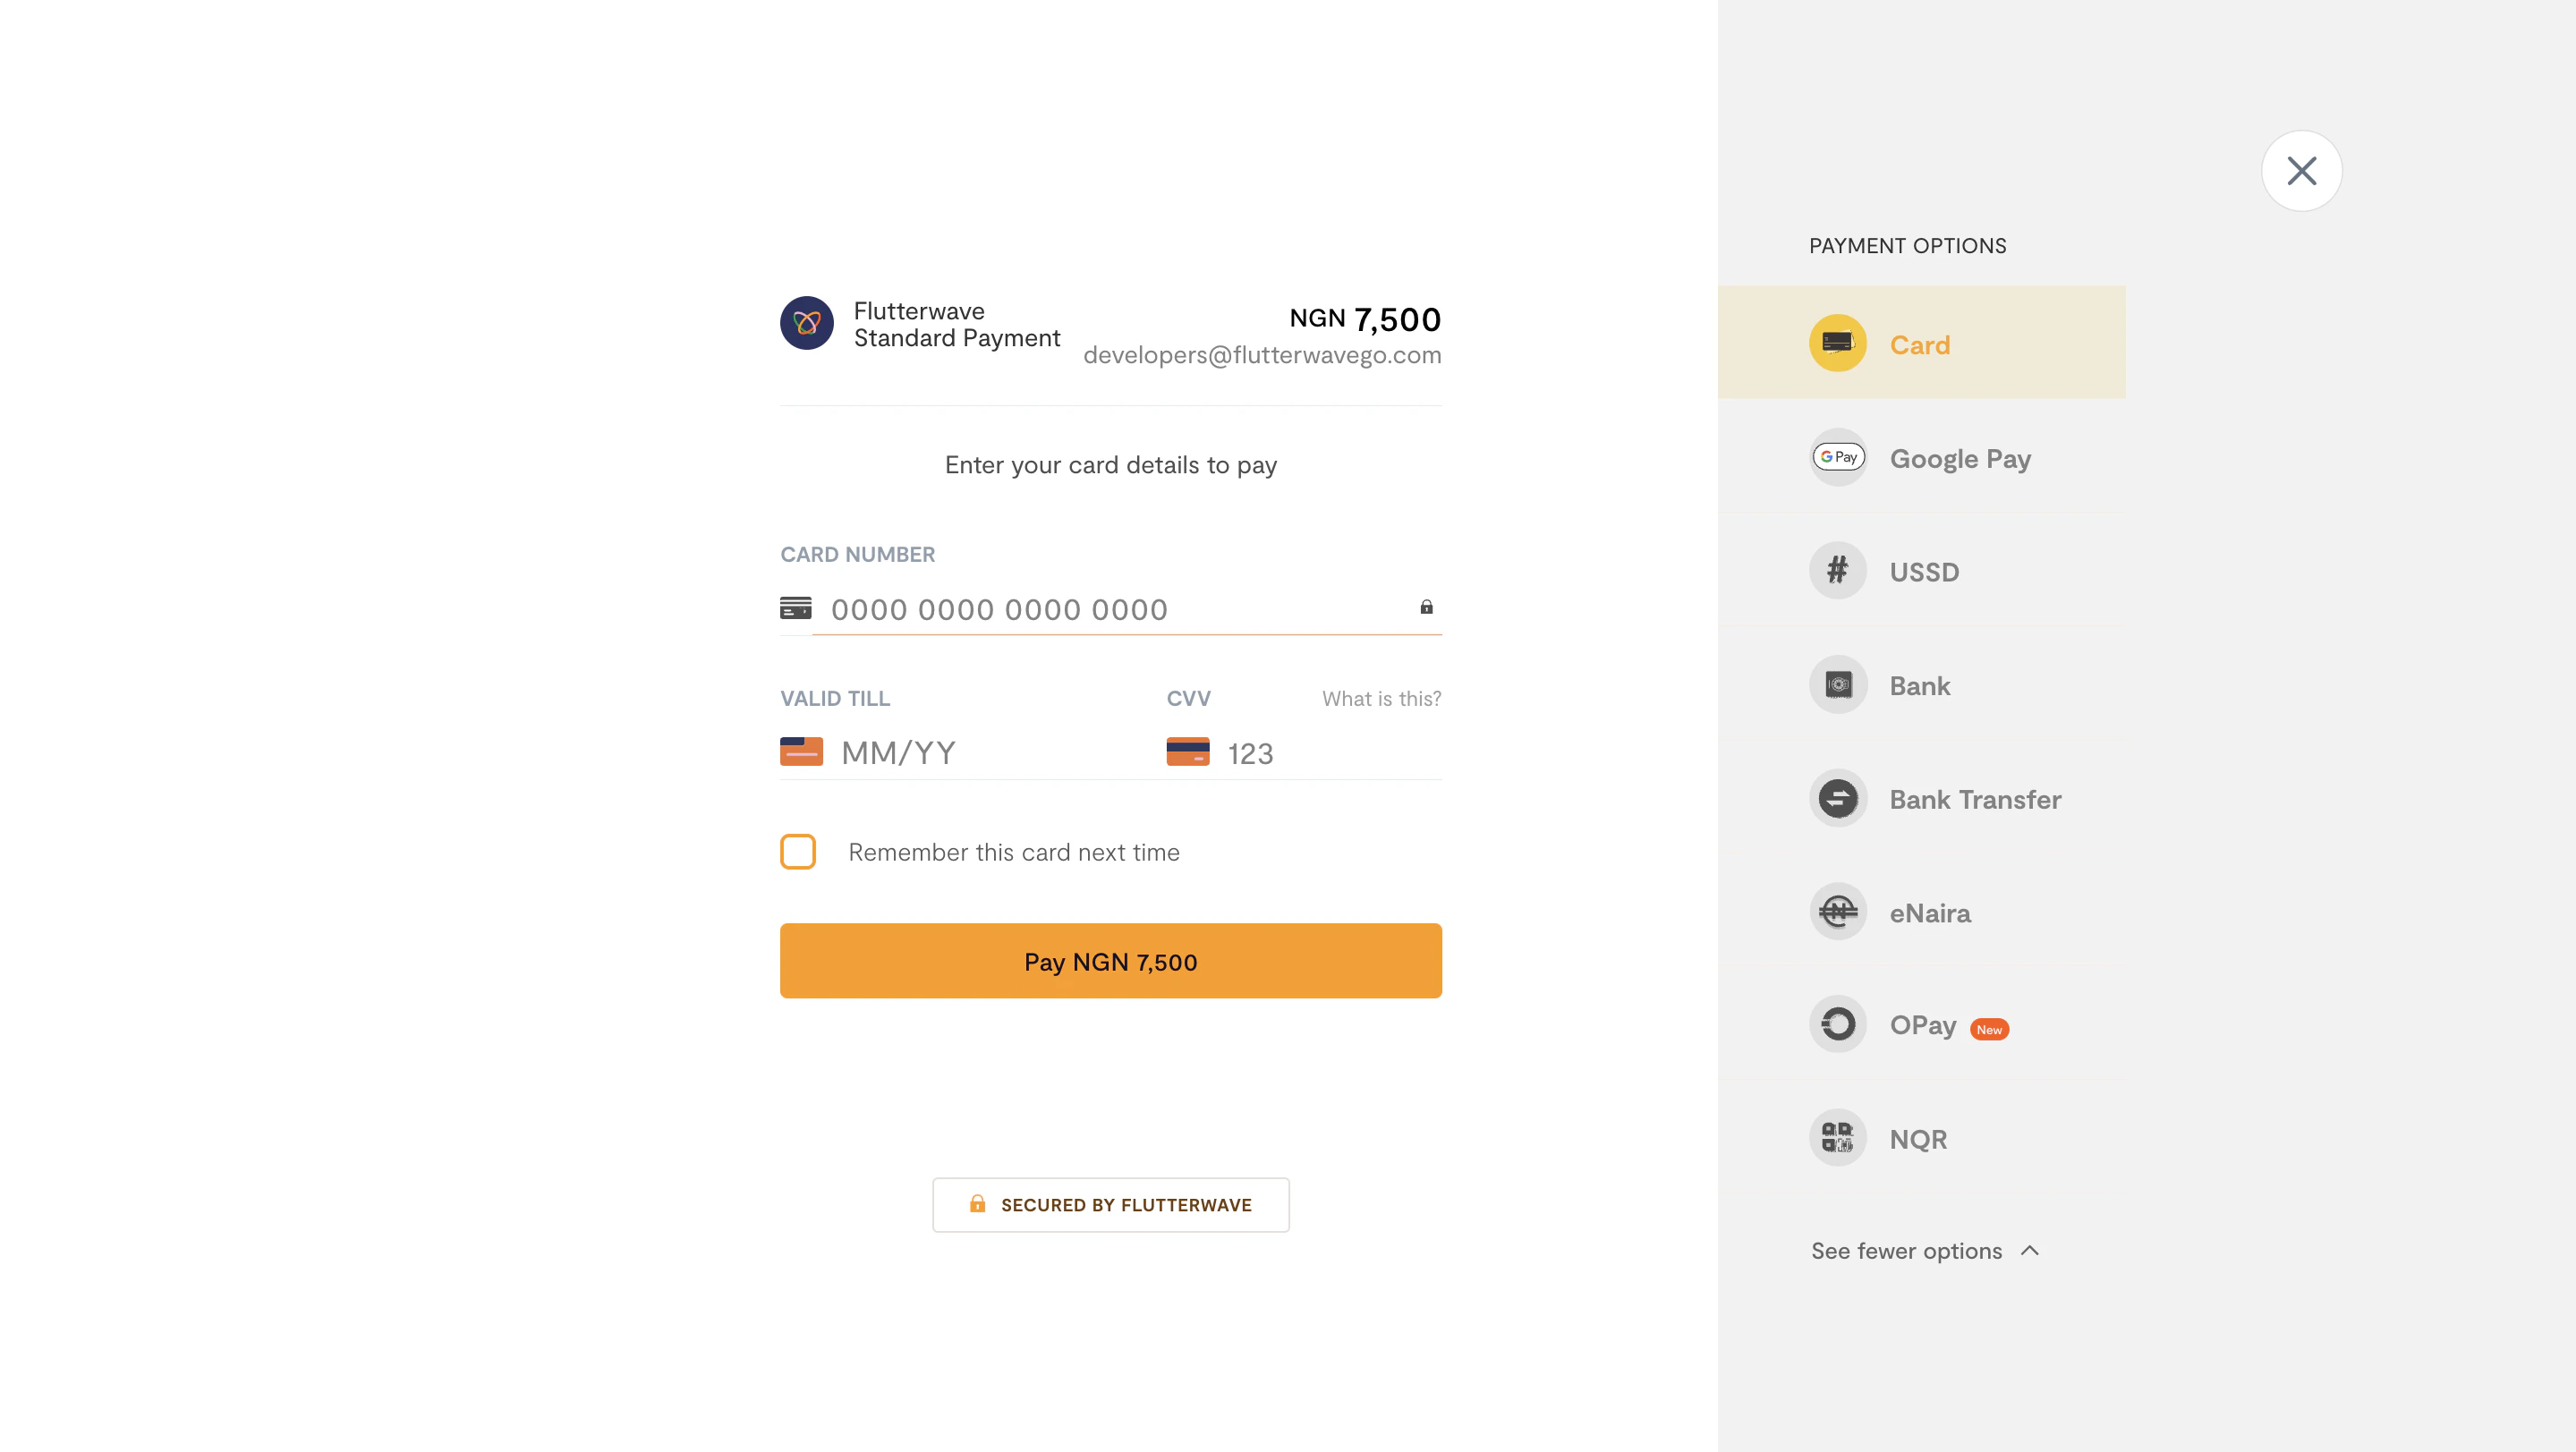
Now, all you need to do is redirect your customer to the link returned in `data.link`, and we'll display our checkout modal for them to complete the payment.
### Transaction Integrity
To ensure the security of payments on the client side, you can optionally use the [checksum](/checksum) feature.
To utilize it when initiating the charge, you need to include a field called `payload_hash` in the request payload. This is a hashed value created by encrypting some immutable values in your request.
The hash is computed at runtime, and compared to the value that has been passed in your request to ensure that the payment is secure.
## Step 2: Get a Payment Link
Next, you'll initiate the payment by calling our API with the collected payment details (remember to authorize with your secret key). Here's an example in Node.js
```javascript Node.js theme={null}
const axios = require('axios');
try {
const response = await axios.post(
'https://api.flutterwave.com/v3/payments',
{
tx_ref: 'UNIQUE_TRANSACTION_REFERENCE',
amount: '7500',
currency: 'NGN',
redirect_url: 'https://example_company.com/success',
customer: {
email: 'developers@flutterwavego.com',
name: 'Flutterwave Developers',
phonenumber: '09012345678',
},
customizations: {
title: 'Flutterwave Standard Payment',
},
},
{
headers: {
Authorization: `Bearer ${process.env.FLW_SECRET_KEY}`,
'Content-Type': 'application/json',
},
}
);
} catch (err) {
console.error(err.code);
console.error(err.response.data);
}
```
And you'll get a response like this:
```json Success theme={null}
{
"status": "success",
"message": "Hosted Link",
"data": {
"link": "https://checkout.flutterwave.com/v3/hosted/pay/flwlnk-01hynrt7cd1fpm6gtef6khn93g"
}
}
```
## Step 3: Redirect the User to the Payment Link
Now, all you need to do is redirect your customer to the link returned in `data.link`, and we'll display our checkout modal for them to complete the payment.
 ## Step 4: After the Payment
Four things will happen when payment is done (successful):
1. We'll redirect to your `redirect_url` with `status`, `tx_ref`, and `transaction_id` query parameters after payment is complete.
2. We'll send you a webhook if you have that enabled. Learn more about [webhooks](/webhooks).
3. We'll send an email receipt to your customer if the payment was successful (unless you've disabled that).
4. We'll send you an email notification (unless you've disabled that).
On your server, you should handle the redirect and always [verify the final state of the transaction](/transaction-verification).
Here's what transaction verification could look like in a Node.js app with our [backend SDK](/sdk-plugins/backend-libraries/nodejs):
```javascript Node.js theme={null}
async function verify() {
try{
const response = await flw.Transaction.verify({id: });
const responseData = response;
console.log(responseData)
if (
responseData.status === "successful" &&
responseData.amount === transactionDetails.amount &&
responseData.currency === "NGN"
) {
console.log('Payment successful!');
} else {
console.log('Payment verification failed!');
}
} catch (error) {
console.error('Error verifying payment:', error.response ? error.response.data : error.message );
}
}
verify()
```
## What if the Payment Fails
If the payment attempt fails (for instance, due to insufficient funds), you don't need to do anything. We'll keep the payment page open, so the customer can try again until the payment succeeds or they choose to cancel, after which we'll redirect to the `redirect_url` with the query parameters `tx_ref` and a `status` of **failed**.
If you have webhooks enabled, we'll send you a notification for each failed payment attempt. This is useful in case you want to later reach out to customers who had issues paying. See our [webhooks guide](/webhooks) for an example.
## Handling Payment Retries and Timeout on Checkout
Flutterwave allows you to configure retries and timeout on checkout to further improve your customers' experience. By setting `session_duration`, you limit the completion time for each payment. Once the duration has elapsed, the payment window is closed, and the user is redirected to the specified URL (`redirect_url`). Uncompleted transactions are immediately cancelled and marked as failed.
Timeout can be set to a max value of **1440 minutes**.
Additionally, you can limit the number of attempts that a user can make for failed transactions on checkout. By setting `max_retry_attempt`, the user is prevented from attempting transactions unnecessarily on checkout. When making a payment, the transaction would be cancelled and marked as failed once a user's attempts go beyond the maximum retries.
Using these configurations can help you improve security on checkout by limiting payment attempts of malicious users. For example, if timeout and retry for a transaction are set to 10 minutes and five (5) attempts, respectively. The transaction fails automatically if the user makes more than five attempts or spends more than 10 minutes completing the transaction.
```javascript Node.js theme={null}
const axios = require('axios');
try {
const response = await axios.post(
'https://api.flutterwave.com/v3/payments',
{
tx_ref: 'UNIQUE_TRANSACTION_REFERENCE',
amount: '7500',
currency: 'NGN',
redirect_url: 'https://example_company.com/success',
customer: {
email: 'developers@flutterwavego.com',
name: 'Flutterwave Developers',
phonenumber: '09012345678',
},
customizations: {
title: 'Flutterwave Standard Payment',
},
configurations: {
session_duration: 10, // Session timeout in minutes (maxValue: 1440)
max_retry_attempt: 5, // Max retry (int)
},
},
{
headers: {
Authorization: `Bearer ${process.env.FLW_SECRET_KEY}`,
'Content-Type': 'application/json',
},
}
);
} catch (err) {
console.error(err.code);
console.error(err.response.data);
}
```
## Step 4: After the Payment
Four things will happen when payment is done (successful):
1. We'll redirect to your `redirect_url` with `status`, `tx_ref`, and `transaction_id` query parameters after payment is complete.
2. We'll send you a webhook if you have that enabled. Learn more about [webhooks](/webhooks).
3. We'll send an email receipt to your customer if the payment was successful (unless you've disabled that).
4. We'll send you an email notification (unless you've disabled that).
On your server, you should handle the redirect and always [verify the final state of the transaction](/transaction-verification).
Here's what transaction verification could look like in a Node.js app with our [backend SDK](/sdk-plugins/backend-libraries/nodejs):
```javascript Node.js theme={null}
async function verify() {
try{
const response = await flw.Transaction.verify({id: });
const responseData = response;
console.log(responseData)
if (
responseData.status === "successful" &&
responseData.amount === transactionDetails.amount &&
responseData.currency === "NGN"
) {
console.log('Payment successful!');
} else {
console.log('Payment verification failed!');
}
} catch (error) {
console.error('Error verifying payment:', error.response ? error.response.data : error.message );
}
}
verify()
```
## What if the Payment Fails
If the payment attempt fails (for instance, due to insufficient funds), you don't need to do anything. We'll keep the payment page open, so the customer can try again until the payment succeeds or they choose to cancel, after which we'll redirect to the `redirect_url` with the query parameters `tx_ref` and a `status` of **failed**.
If you have webhooks enabled, we'll send you a notification for each failed payment attempt. This is useful in case you want to later reach out to customers who had issues paying. See our [webhooks guide](/webhooks) for an example.
## Handling Payment Retries and Timeout on Checkout
Flutterwave allows you to configure retries and timeout on checkout to further improve your customers' experience. By setting `session_duration`, you limit the completion time for each payment. Once the duration has elapsed, the payment window is closed, and the user is redirected to the specified URL (`redirect_url`). Uncompleted transactions are immediately cancelled and marked as failed.
Timeout can be set to a max value of **1440 minutes**.
Additionally, you can limit the number of attempts that a user can make for failed transactions on checkout. By setting `max_retry_attempt`, the user is prevented from attempting transactions unnecessarily on checkout. When making a payment, the transaction would be cancelled and marked as failed once a user's attempts go beyond the maximum retries.
Using these configurations can help you improve security on checkout by limiting payment attempts of malicious users. For example, if timeout and retry for a transaction are set to 10 minutes and five (5) attempts, respectively. The transaction fails automatically if the user makes more than five attempts or spends more than 10 minutes completing the transaction.
```javascript Node.js theme={null}
const axios = require('axios');
try {
const response = await axios.post(
'https://api.flutterwave.com/v3/payments',
{
tx_ref: 'UNIQUE_TRANSACTION_REFERENCE',
amount: '7500',
currency: 'NGN',
redirect_url: 'https://example_company.com/success',
customer: {
email: 'developers@flutterwavego.com',
name: 'Flutterwave Developers',
phonenumber: '09012345678',
},
customizations: {
title: 'Flutterwave Standard Payment',
},
configurations: {
session_duration: 10, // Session timeout in minutes (maxValue: 1440)
max_retry_attempt: 5, // Max retry (int)
},
},
{
headers: {
Authorization: `Bearer ${process.env.FLW_SECRET_KEY}`,
'Content-Type': 'application/json',
},
}
);
} catch (err) {
console.error(err.code);
console.error(err.response.data);
}
```