- Test Mode: This mode does not require the use of real money and designed exclusively for testing purposes. You can simulate data to replicate real-world scenarios using our test cards and bank accounts without any financial impact. It lets you test and validate your integration before going live.
- Live Mode: This mode is the production environment where real money, real transactions, and real operations take place. It handles actual customer data and financial transactions. Only switch to this after you’ve tested your integrations thoroughly on test mode.
_TEST as prefix (for example, FLWPUBK_TEST-32193bba8dab84e3d9c4525c85ea7a12-X)
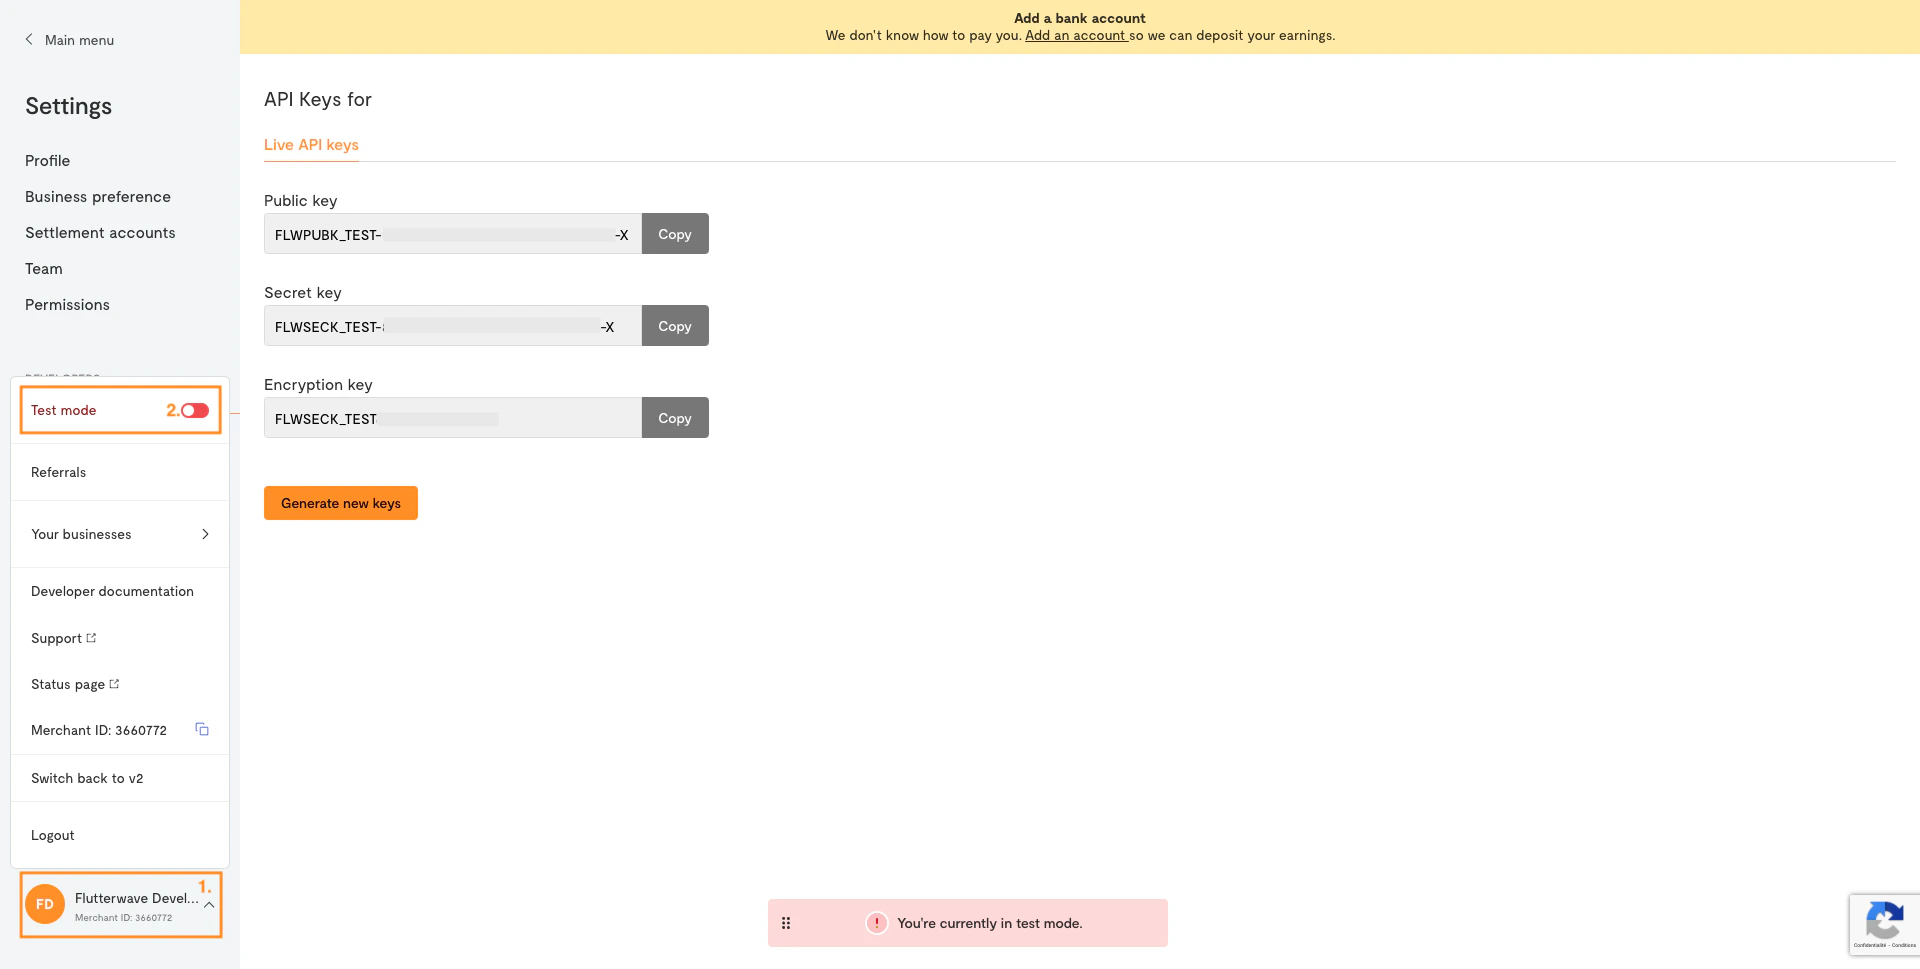
Get your API keys
When you create a Flutterwave account, you will be given three kinds of API keys:- Secret key: The most powerful type of key. It authorizes any action on your account, so it should never be exposed publicly.
- Public key: The key you’ll use in “public” scenarios, like in front-end JavaScript code (e.g. Flutterwave Inline).
- Encryption key: Only used with the direct card charge endpoints. See the encryption guide for more details.
- Log into your Flutterwave account
- Go to your dashboard.
- Navigate to Settings
- Select the API Keys menu under the
DEVELOPERSsection and copy your keys.
Authorizing API calls
All API calls on Flutterwave are protected by default. Any API requests made without proper authorization will result in the status code 401: Unauthorized.Your secret key can perform any actions on your Flutterwave account without restriction. It should be kept confidential and only stored on your servers, preferably as an environment variable.It should not be included in your Git repository or front-end JavaScript code.
Bearer: YOUR_SECRET_KEY.
For example, an API call in Node.js would look like the following: